


As summer approaches, we’re looking to give our home’s exterior a bit of a facelift. A simple way to make a big difference is by refreshing the landscape rock and mulch around our yards. It’s a project that can really boost curb appeal without costing a fortune. We’ll explore how to pick the right materials and get them installed properly.
Key Takeaways
- Choosing the right landscape rock and mulch involves looking at different types of rocks and selecting the best mulch for your garden beds.
- Proper preparation of your landscape is important before starting the landscape rock mulch installation.
- We will cover effective methods for landscape rock mulch installation to achieve a polished look.
Choosing The Right Landscape Rock And Mulch For Your Project
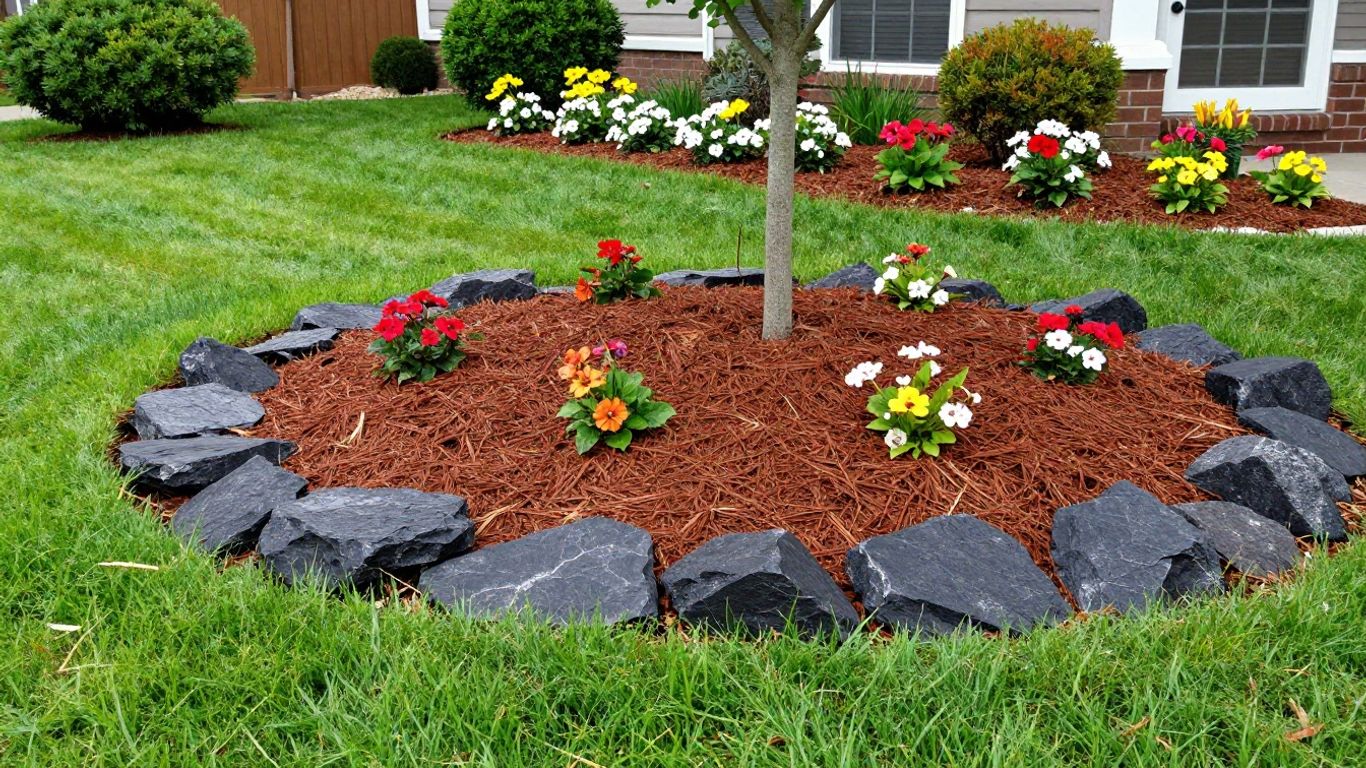
Picking out the right materials for your yard can feel like a big decision, but it doesn’t have to be complicated. We’re going to look at how to select landscape rock and mulch that will make your home look great, especially with summer just around the corner. Getting this right means your garden beds will look neat and tidy, and you’ll spend less time on upkeep later.
Understanding Different Types Of Landscape Rock
Landscape rocks come in all sorts of shapes, sizes, and colors. What you choose really depends on the look you’re going for and what works best for your garden. We often see a few popular types:
- Gravel: This is usually smaller, angular pieces. It’s good for pathways or areas that need good drainage. It’s also pretty budget-friendly.
- River Rock: These are smooth, rounded stones, often in mixed colors. They look natural and are great for dry creek beds or just adding a decorative touch.
- Crushed Stone: Similar to gravel but can be more uniform in size. It packs down well, making it a solid choice for driveways or as a base layer.
- Decorative Boulders: These are larger rocks that can be used as focal points in a garden. They add a lot of character.
When we’re picking rocks, we think about how they’ll hold up over time. Some rocks can fade in the sun, while others might shift around if not installed properly. We also consider the drainage needs of the area. A good drainage path is important for plant health and preventing water damage.
Selecting The Best Mulch For Your Garden Beds
Mulch is like a blanket for your garden soil. It helps keep moisture in, stops weeds from growing, and can even improve the soil as it breaks down. There are two main categories: organic and inorganic.
- Organic Mulches: These come from plants and will decompose over time. Examples include:
- Wood Chips: A very common choice, available in different sizes and colors.
- Bark Mulch: Often made from shredded bark, it has a nice texture.
- Straw or Hay: Good for vegetable gardens, but can blow around easily.
- Compost: Excellent for improving soil, but might not have the most polished look on its own.
- Inorganic Mulches: These don’t break down. They’re usually made of stone or gravel, which we’ve already talked about. They’re good for areas where you don’t want much plant growth.
We usually recommend organic mulches for most garden beds because they feed the soil. When we’re choosing, we look at how long it will last and how it will look with our plants. Some mulches can get a bit dusty or fade quickly, so it’s worth checking reviews or asking for samples if you can.
A common mistake is putting mulch down too thick. We aim for about a 2-3 inch layer. Too much can actually suffocate plant roots and make it hard for water to get through. It’s better to add a bit more later if needed than to pile it on all at once.
Think about the color too. Darker mulches tend to make plants pop, while lighter ones can make a space feel brighter. We also consider how much maintenance we’re willing to do. Some mulches need topping up more often than others.
Mastering Landscape Rock Mulch Installation Techniques
Getting your landscape looking sharp with new rock and mulch is a satisfying project. We’ve found that a little preparation goes a long way, making the actual installation much smoother. Let’s walk through how we approach this.
Preparing Your Landscape For Rock And Mulch
Before we even think about spreading a single stone or shred of mulch, we make sure the area is ready. This step is really important for a clean, long-lasting result.
- Clear the Area: We start by removing all existing vegetation, weeds, and debris. This might mean pulling weeds by hand, using a hoe, or even a weed trimmer for tougher spots. Getting rid of everything now prevents those weeds from popping up through your new layer later.
- Edge Your Beds: Creating a clean edge between your lawn and garden beds makes a big difference. We use a flat spade or an edger tool to cut a crisp line. This not only looks good but also helps keep grass from creeping into your mulched areas.
- Level the Ground: If the area is uneven, we try to level it out as much as possible. This helps the rock and mulch sit uniformly and prevents water from pooling in certain spots.
- Consider a Weed Barrier: For areas where weed control is a top priority, we often lay down landscape fabric or a layer of newspaper. This acts as a physical barrier. We’ve found that fabric works well for rock, while newspaper can be a good, biodegradable option for mulch beds, though it needs to be thick enough.
Effective Landscape Rock Mulch Installation Methods
Once the prep work is done, it’s time for the fun part – adding the new materials. The method can vary slightly depending on whether you’re using rock or organic mulch.
For Landscape Rock:
- Spread Evenly: We typically aim for a layer of about 2-3 inches of rock. Using a rake, we spread the rock evenly across the prepared bed. It’s important not to pile it too high, especially around plant bases, as this can trap moisture and harm the plants.
- Work in Sections: If you have a large area, it’s easier to work in smaller sections. This way, you can manage the material and ensure consistent coverage without it getting out of hand.
- Rinse if Necessary: Some types of decorative rock can be dusty. If you want that clean, fresh look right away, a quick rinse with a hose can help wash away the dust.
| Rock Type | Typical Depth (inches) | Best For |
|---|---|---|
| Pea Gravel | 2-3 | Pathways, general ground cover |
| Lava Rock | 2-3 | Drainage, modern aesthetics |
| River Rock | 2-3 | Water features, decorative accents |
| Crushed Stone | 2-3 | Driveways, base layers, drainage |
For Organic Mulch:
- Apply a 2-4 Inch Layer: We generally apply organic mulch like bark chips or shredded wood to a depth of 2 to 4 inches. This depth is good for retaining moisture, suppressing weeds, and regulating soil temperature. Again, keep it a little away from the immediate base of plants.
- Avoid Over-Mulching: Too much mulch can suffocate plant roots and encourage rot. We always check the depth and make sure we aren’t piling it up too high, especially around tree trunks.
- Replenish Annually: Organic mulches break down over time. We plan to add a fresh layer each year or two to maintain the benefits and appearance.
We’ve learned that the key to a great-looking and healthy landscape is consistent maintenance. Taking the time to prepare properly and install materials correctly the first time saves a lot of headaches down the road. It’s about creating a foundation that supports plant health and looks good for seasons to come.
Wrapping Up
So, we’ve gone over how to refresh that landscape rock and mulch. It’s a pretty straightforward way to make our homes look better as the weather warms up. We think taking the time to do this now will really pay off when summer arrives and we’re all spending more time outside. It’s not a huge job, but the difference it makes is quite noticeable. We hope this helps you get your yards looking just right for the season ahead.
Frequently Asked Questions
How do we pick the best rocks and mulch for our yard?
When we’re choosing rocks and mulch, we should think about what we want our yard to look like and what will work best for the plants we have. For rocks, we can find different sizes and colors, like smooth river stones or sharp-edged gravel. For mulch, we have options like wood chips, shredded bark, or even compost. We should consider how long they’ll last and if they help keep weeds away and moisture in the soil. It’s a good idea to look at what other homes in our neighborhood have done for inspiration, too.
What steps do we need to take before putting down new rocks and mulch?
Before we start spreading new materials, we must prepare the area. First, we should remove any old mulch, weeds, or debris that’s currently there. This makes sure our new layer sits on clean soil. We might also want to check the soil’s condition and add compost if needed. If we’re using landscape fabric under the rocks, now is the time to lay it down to help stop weeds from growing up through the stones. Making sure the ground is level and clear is key for a neat finish.
Are there any tips for making our rock and mulch job look professional?
To get that polished look, we should aim for an even layer of material across the entire area. For rocks, we want them spread out so they cover the ground well without being too thick or too thin. For mulch, a depth of about 2 to 3 inches is usually good for most plants. We should also be careful to keep the rocks and mulch a little bit away from the base of trees and plants to prevent rot. Finally, taking a step back to see if the edges are clean and straight can make a big difference in how tidy everything appears.
